Setup and assign assessments
If at least one assessment definition is available, you can locate that definition and then set up and assign the assessment.
Filter the assessment list
On the right-side of the Assessments page, use the drop-down menus to filter the assessment list by:
Started Status
Completed Status
Show assessments assigned to specific individuals.
Due date
Setup and assign the assessment
Before an assessment may begin, it is necessary to set it up and assign it to a person.
Follow the steps below:
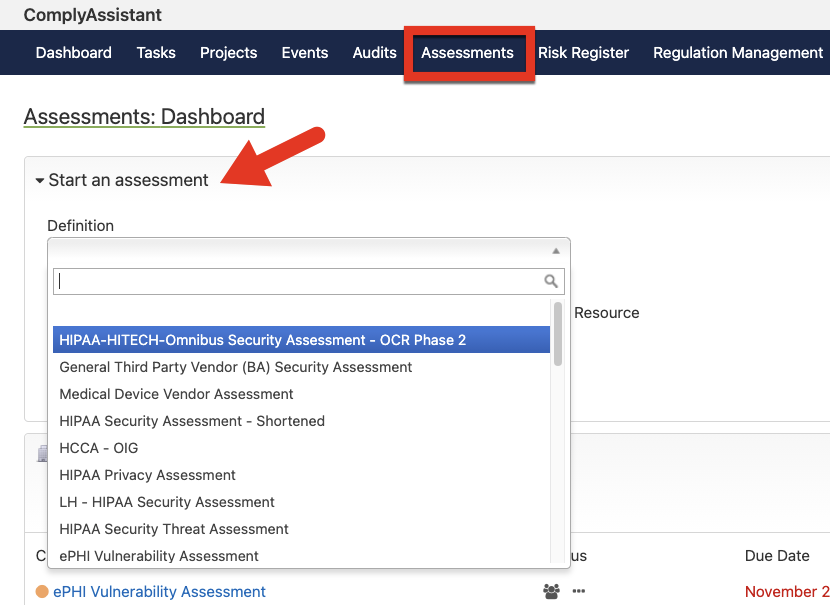
- To begin a new assessment, go to the Assessments module and click the Start an Assessment link, then choose the assessment from the drop-down list.
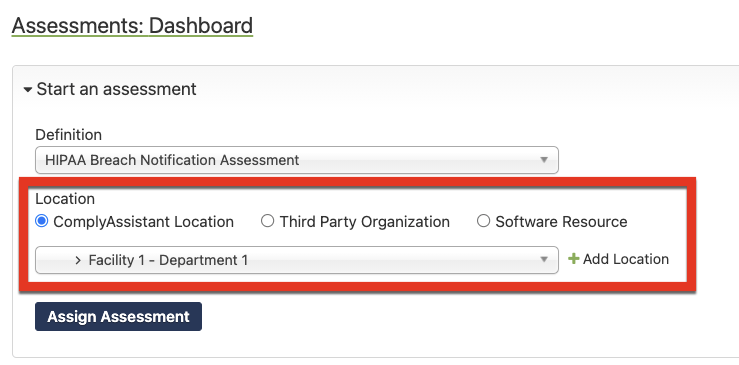
- For Location, choose ComplyAssistant Location, Third Party Organization, or Software Resource. See Types of Assessments in .
- Choose the specific location from the next drop-down. If necessary, click the + Add Location link.
- Click Assign Assessment.
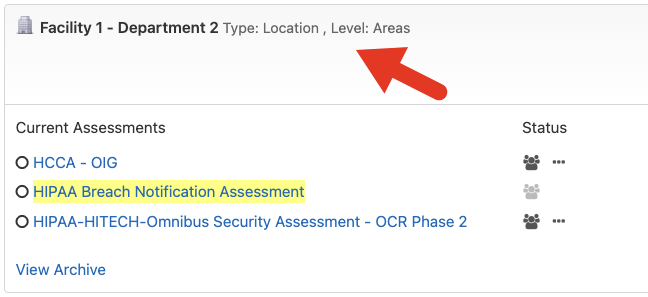
- Scroll down the page to see that the new assessment has been highlighted. Notice that the location you chose is shown in the title.
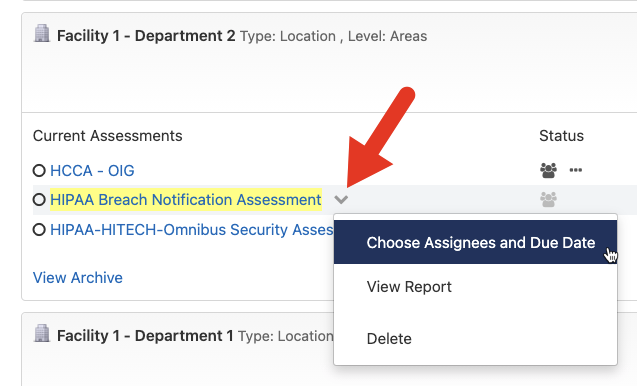
- Next, you’ll need to assign the assessment to a person. Click the small drop-down arrow next to the assessment, and then click Choose Assignee and Due Date.
- In the popup window, edit the Description and choose one or more Assignees.
- Choose a Frequency at which the assessment is to be done.
- Choose a Start Date and End Date and click the Submit button.

At this point, you've created your assessment definition, you've assigned it, and the assignees will be notified by email.